

How to Identify and Correct an Access Rights Problem
How to Identify and Correct an Access Rights Problem
CA Chorus for Security and Compliance Management™
Version 03.0.00

How to Identify and Correct an Access Rights Problem
As a security administrator, modifying access rights for resources within your scope is a task that you regularly perform. This task is important because it:
- Ensures that users have appropriate access to resources.
- Enables users to access the appropriate resources quickly and remain productive.
This example describes how you can use CA Chorus and CA Top Secret to identify and correct an access rights problem, and then verify that you have corrected the problem.
In this example, you have just received a service desk ticket with the following information:
- An employee does not have proper access rights to information that is critical for the job.
- The employee has opened a helpdesk ticket to correct the problem.
- The manager confirms that you should give access to the employee.
- The employee has provided the name of a colleague who already has access to this information.
Your research indicates that the employee needs read access to a particular data set.
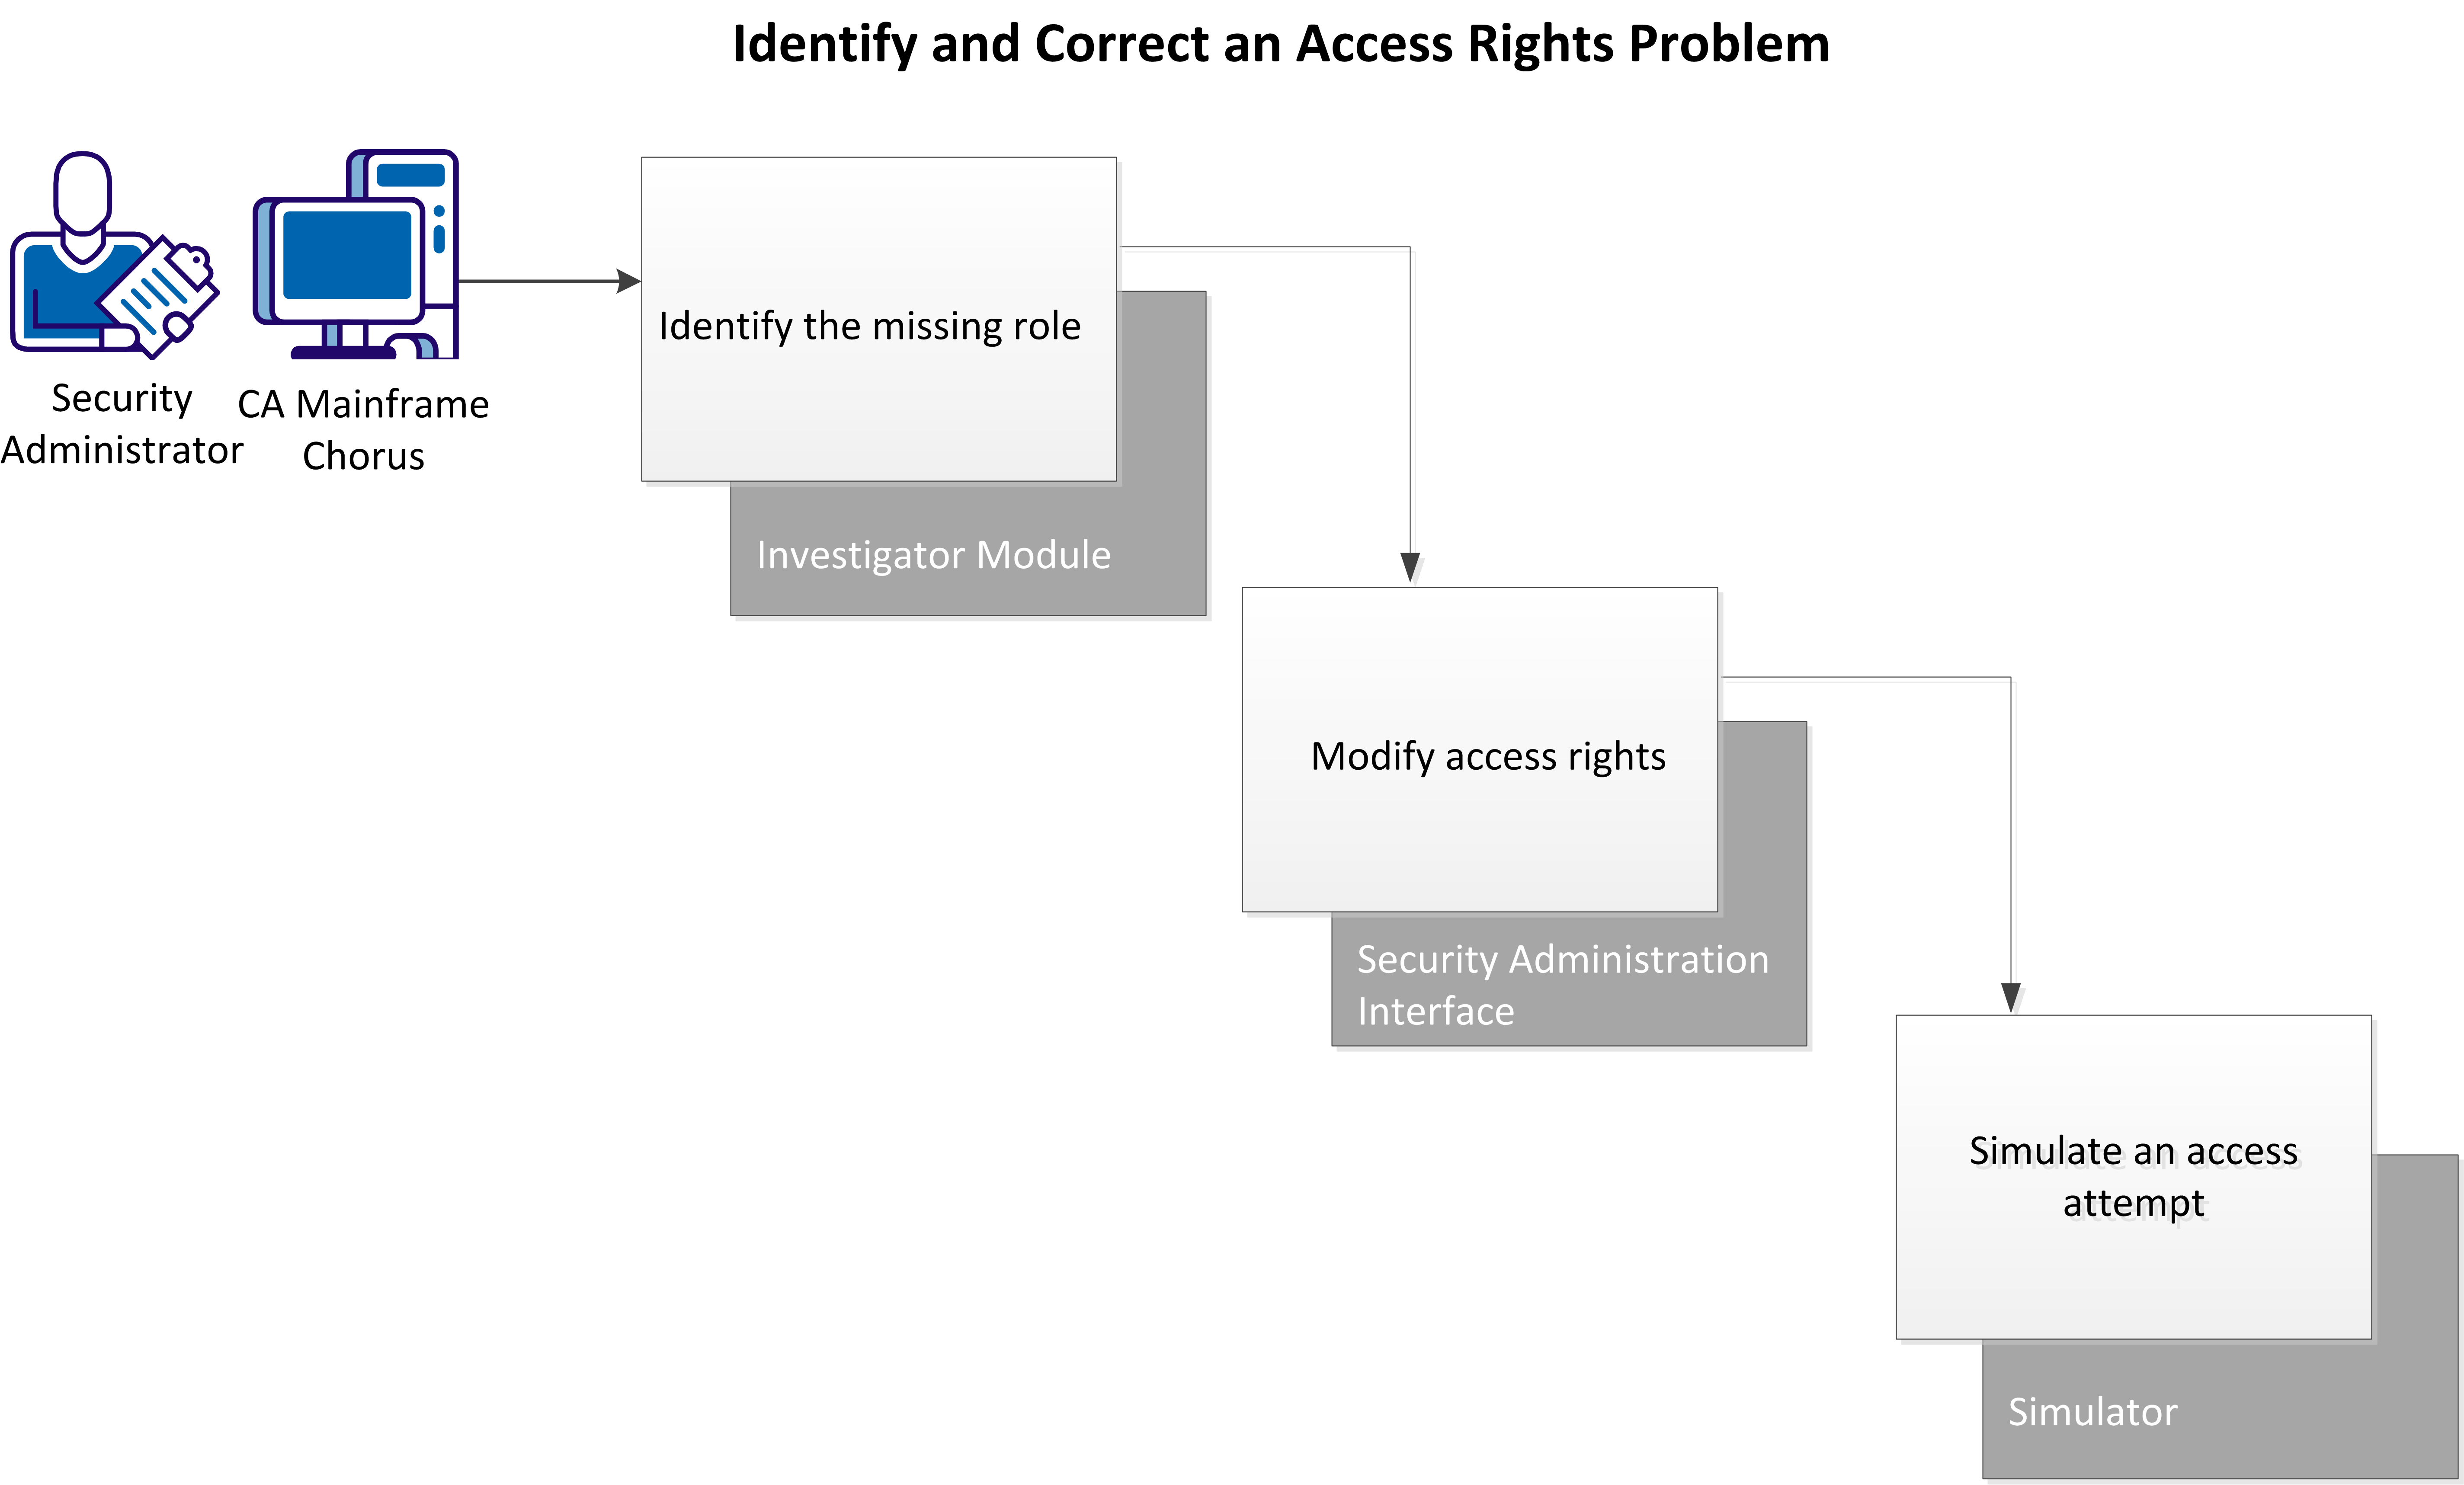
Perform these tasks to identify and correct the access problem:
- Identify the missing role.
- Modify access rights.
- Verify the New Access.
Identify the Missing Role
Use the Investigator to compare two users to identify which role a user requires to access a particular resource.
In CA Chorus a role is a collection of rules that define permissions for access to resources. Adding rules in groups helps you to administer security more efficiently and accurately.
Follow these steps:
- Add the Investigator module to your workspace and click Start New Investigation.
- Select Security.
- Select Definitions, Users from the Investigator tree.
The Search Users view appears.
- Filter users by User ID or Group and click Search.
- Select each user to compare from the list and click Add to Visualizer under Actions.
The Visualizer opens showing icons for each added user.
- Right-click each user icon, select Show Child Objects, Show Roles.
The relationships between the roles for each user appear.
- Drill down into any unshared roles by clicking the role icon and selecting Show Rules on the Actions pane.
Rules for that role appear in the bottom pane.
- Examine the rules until you find the rule that grants access appropriate access to the resource you are looking for.
You have identified the access problem.
Modify the Access Rights
Add a profile to a user ACID using the Security Administration Interface. Adding a profile to an ACID adds all the rules contained in the profile to the ACID.
Follow these steps:
- Add the Quick Links module to your workspace and click Administer Security Definitions.
The main Security Administration window opens.
- Click the applicable Security Administration instance from the Administration pane.
One of the following occurs:
- If your CA Chorus credentials are also valid on this instance, Security Administration opens. The Logged In As field displays your user name, and the Administration pane expands to show you your options.
- If your CA Chorus credentials are not valid on this instance, the Log In page for that Security Administration instance appears. Enter your user ID and password.
You are logged in to the selected system.
- Select ACIDs, Modify an Acid on the Administration pane.
- Enter the user ACID to add the profile to in the ACID field and click Search.
- Select the ACID.
- Click the Profile/Group List subheading.
- Enter the profile name to add in the Profile/Group Name field.
- Enter the appropriate information in the remaining fields.
- Click Modify.
The profile is added to the user ACID.
Simulate Access Attempt to Verify Access
Use the Simulator to test the access of a user to a data set. Simulating access verifies that a user ID has the appropriate access rights to a resource.
Follow these steps:
- Add the Quick Links module to your workspace and click Simulate Access Attempt.
- Select the correct system from the System drop-down list.
- Choose one of the following options:
- If the user name for the selected system is the same as the logged-in user name, go to step 6.
- If the user name for the selected system is different, go to step 4.
Note: After you select a system, CA Chorus generates a PassTicket to authorize your connection. If the PassTicket authorization fails, you can enter your password to access the system.
- Enter your user name.
- Enter the password for the selected system. The Password field appears in the following cases:
- The PassTicket generation fails.
- The user name that you enter is different from the logged-in user name.
- If the application ID is not set while configuring the security systems. The application ID is used to generate a PassTicket for a logged-in user
- Enter the appropriate information in the remaining fields and click Simulate.
- Review the simulation results to verify that the user now has appropriate access to the data set.
Copyright © 2013 CA Technologies.
All rights reserved.
|
|